One solution is to buy more storage space. As a for-profit business, Google obviously prefers that you get your wallet out. But another solution is simply to open another Google account (or use an already existing one) and transfer as many of your old files over to that Google Drive space. Then delete them from your main Drive account. Google doesn’t offer a seamless experience for doing this as they obviously want you to pay to bump up your storage. Making this process easy would just hurt their bottom line. But there is a free method for manually transferring your files to wherever you want them to go, involving the use of Google Takeout.
Google Takeout – Not a Place To Order Your Pizza
When I hear the word “takeout”, I get hungry, thinking about pizza and Chinese. But in actual fact Google Takeout has nothing to do with food. Instead, it’s all about getting a copy of all of your data whenever you want it. Google Takeout covers virtually every service it offers and you can download all of the data you have entered into that service. You can then move it to wherever you want or simply keep it on your computer as a backup. For the purposes of this article, we are going to be focused solely on Google Drive and moving all of those files to another Drive account.
Getting Your Files Out Of Drive Account 1
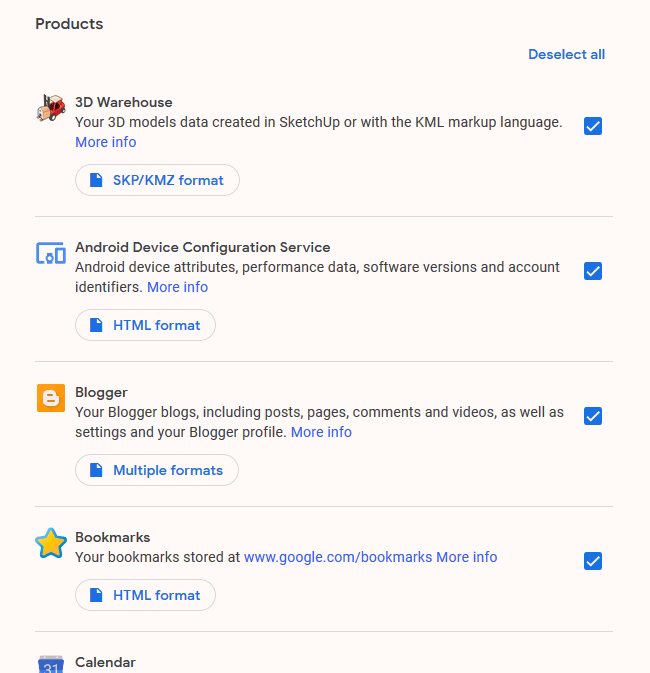
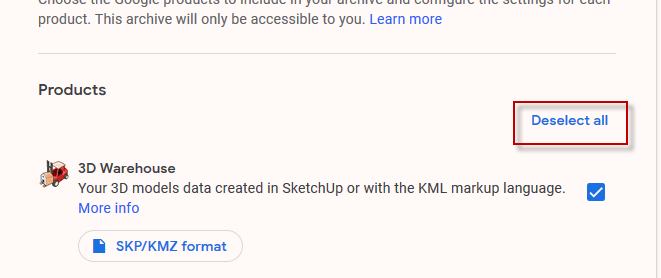
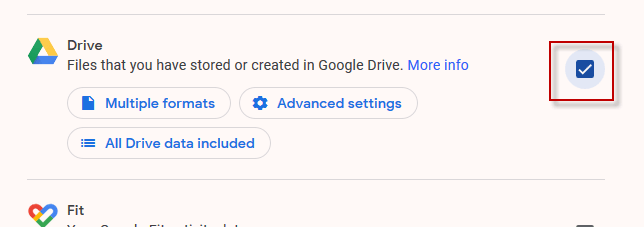
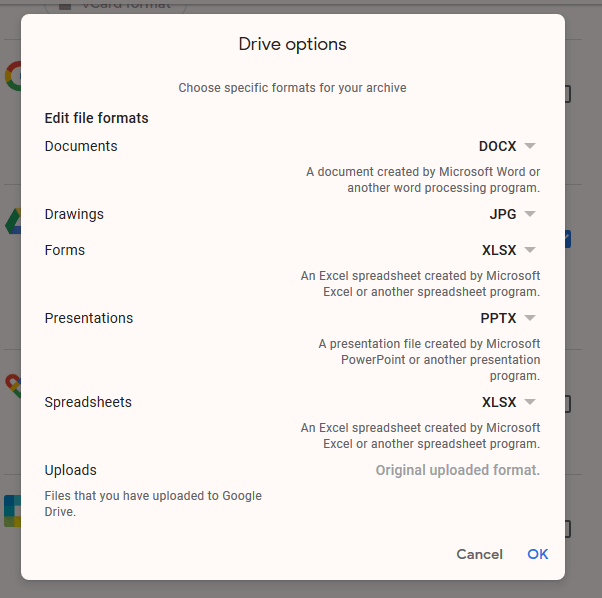
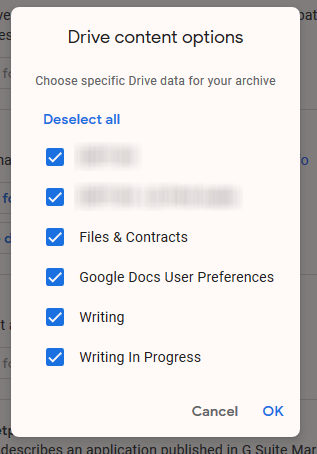
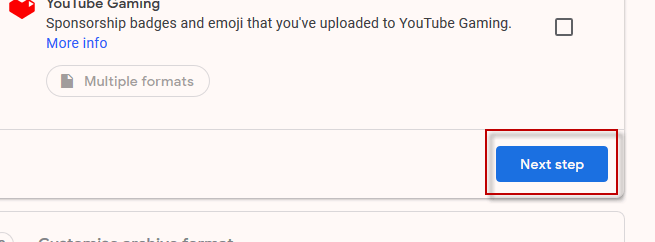
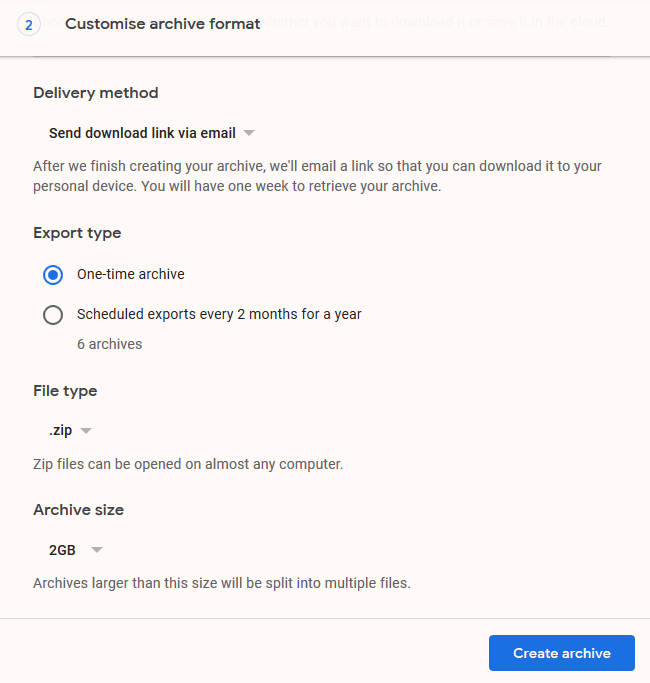
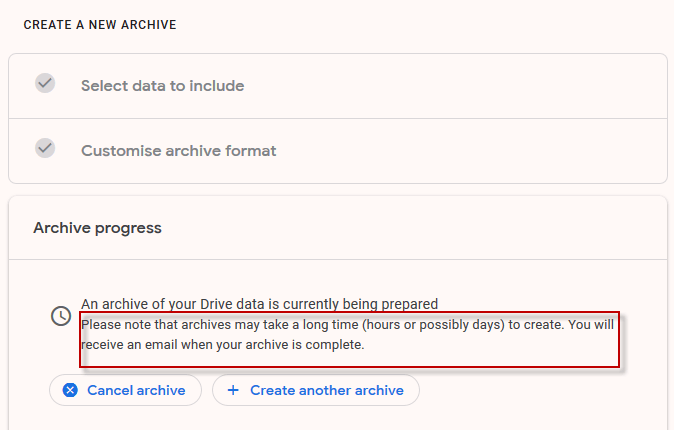
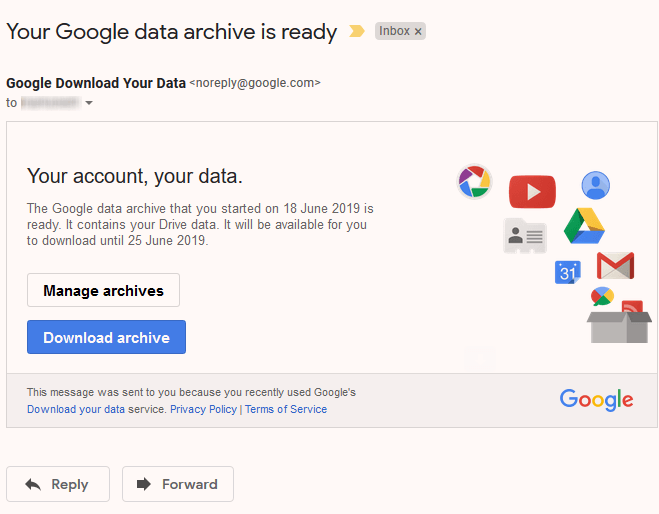
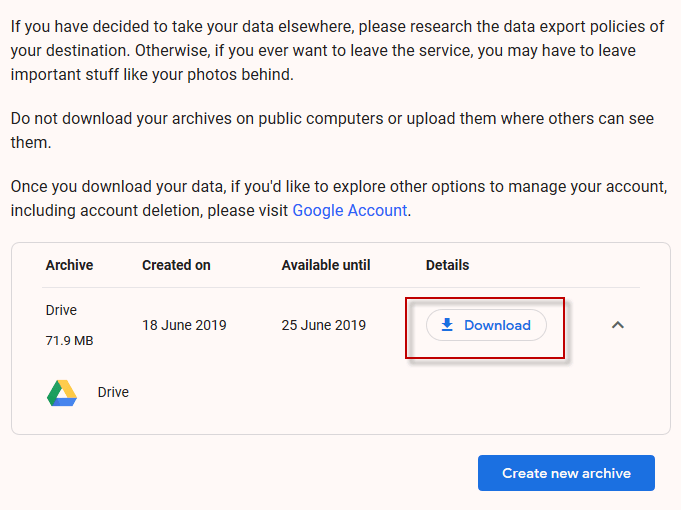
First, sign into the Drive account where you want to move the files out. Once you’ve done that, go to the Google Takeout page (you may be asked to log in again). You will then see that every service is selected by default. So at the top, click “Deselect All” to remove all of those ticks. Now scroll down the page to “Drive” and tick the box to select it. Under “Multiple Formats”, choose which formats you want your documents to be exported under. Ironically enough, you CANNOT export under Google Office format. This is the only major drawback to doing this. Unless you have a good reason for doing so, I’d suggest leaving it at the default formats Google suggests. By default, all drive contents are selected but if you only want select folders, click “All Drive Data Included” and deselect any you don’t want. Please note all files must be in a folder for them to be exported. Any not in a folder will not be moved. Now scroll all the way down to the bottom of the page and click “Next Step”. In the next step, just leave the default options as they are. Your download link will be sent via email and you can download it as a zip archive. Click “Create Archive” to get the ball rolling. It tells you that it could take hours or possibly days to get your archive, but like all things, it depends on how much data we’re talking about here. For my Drive files, it took ten minutes for the email to arrive with the download link. After clicking on the “Download archive” button, you will be taken to a Takeout page with a “Download” button. Click that to begin the download of your zip file containing your files.
Putting The Files Into Drive Account 2
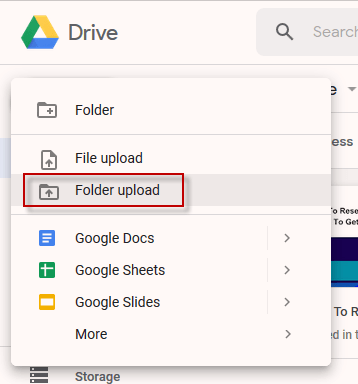
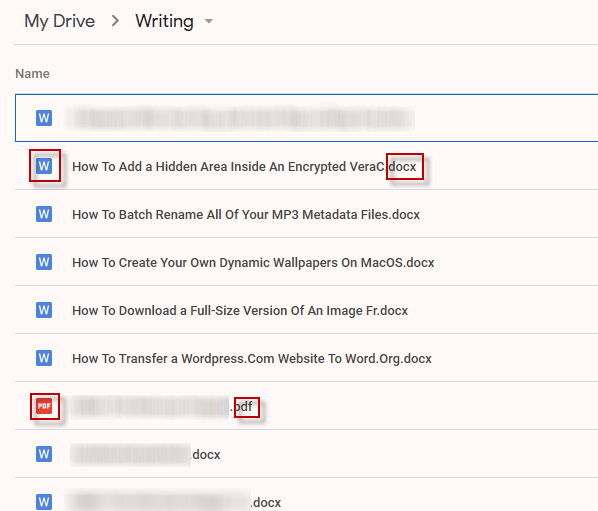
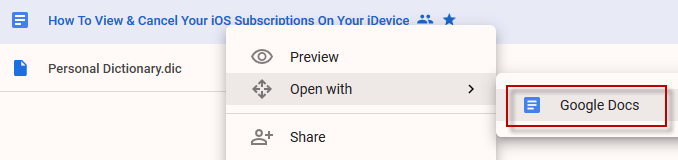
Once your zip file has been downloaded, unzip it and you will see the folder structure exactly as it is on your current Drive account. Now log into the second Drive account (the one that you will be using as a backup account). In Drive, drop down the left-hand menu and select “Folder upload”. Navigate to the folder on your computer with the exported Drive files and watch them upload to your new Drive account. However, as I said before, they will not appear as Google Office files. Rather Microsoft files, PDF’s, etc. From a storage space point of view, this is rather inconvenient. As far as I can see, the only way is to convert them to Google Office format individually, by right-clicking on each one and doing Open with–>Google Docs. This will switch the format over. However, you may want to take your time doing that on an “as needed” basis as it will be tedious and time consuming doing them all at once.
Deleting The Files From Drive Account 1
If you moved the files over to the secondary account for space reasons, then it makes sense for you now to delete them from the first account. Remember to also empty the trash bin and you will now have lovely extra space appearing for even more files.